

Add a personal touch to the lampshades around your home with this simple tutorial! Gather a few supplies and learn how to add a bead trim to any lampshade.
I love doing beaded lampshades! I have 6 that I’ve done around my house. And just for fun, when the color or style doesn’t suit you anymore, you can always cut off the old beads and add new ones, making it a whole new look!
Materials:
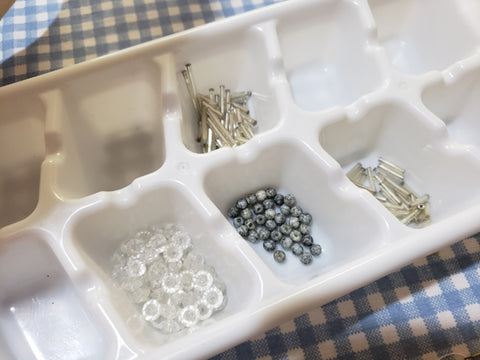
Beads (There are endless varieties of beads; just pick whatever stands out to you. I chose 4 coordinating gray beads.)
Bead Needle, thin enough to fit through the hole in the beads
Thin Thread
Lampshade
Every lamp will require a different amount of beads depending on the size of the lamp shade. I usually account for a hanging bead strip every ½” or so, depending how solid I want the beads to hang. So if you have a 30” lampshade, you'll need 60 bead strips.
Its works best to remove the lampshade from the lamp and set it upside down. You can measure and mark around the inside so that the beads are evenly spaced. To keep your beads organized while working, just use an ice tray!
Start with a nice long string of thread. From the inside of your lampshade, poke the needle out and back in. Tie a sturdy knot.
Thread a strip of beads onto the thread with your needle. After placing the last bead on, send your needle back through all the beads, except the last one.

Tighten up the bead strip until it's hanging ¼” away from the lamp shade cloth. You don’t want to tighten the beads all the way to the shade, because they need room to dangle. Poke the needle out of the lampshade, at the same place your bead thread starts. Do one stitch and poke the needle back in. Hop over to the next marking and poke the needle out, and back in again, and begin the next bead string. Follow this process until you are all the way around the shade. Each time you need more thread, just tie the knot on the inside.

I use the same color thread as the shade, so you don’t see the stitches on the outside. Another option is to add a ribbon or lace over top of the stitching on the outer lampshade.
And that's it! This project is simple to do, and there are so many ways you can make it uniquely your style.
Click here to read more about Good's Store serving as a fabric store in Lancaster, PA.
Comments (2)
This is lovely! I love your posts!
Beautiful ideas thanks for posting